
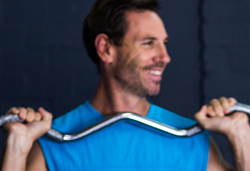
Most people don’t think much about working out their back, at least not before they suffer from back pain, especially lower back pain or some other kind of back discomfort.
Got no time to work out your back? Don’t worry.You don’t need to go to the gym nor do you need a home gym to do any of the back exercises that we show here.
The best thing, it only takes a couple of minutes to complete a back workout.
I gathered for you here the best bodyweight back exercises you can do at home.
Also included are videos and how to’s showing you exactly how to do each exercise with perfect form.
You don’t need any weights or any equipment, just your own body 🙂
If you’re looking to improve your overall strength, balance, posture, and range of motion, add these bodyweight back exercises to your fitness routine. They are a simple but effective way to achieve a strong core.
The back is the powerhouse of the human body. It provides structure, strength, and mobility for every action we take, from walking to lifting. Because our back is not visible to our own eyes, we often neglect it when working out.
The anatomical structure of the human back is a much more complex than the elbows and knees.
Your back is designed to move in 3 dimensions, that’s why there are dozens of exercises available to strengthen, mobilize and stabilize this critical area of the body.
Because I’ve only selected here the top five back exercises, I made sure these cover all major muscles of the back.
Besides back exercises, doing some form of cardio is also good for the back. You could either use back friendly cardio equipment, or even simply doing walks.
Remember as always to consult with your doctor before beginning any training regimen.
To go directly to the exercises click here.
7 Reasons You Should Exercise Your Back
- Relieve Back Pain – If your core muscles are weak, they cannot properly support the spine. Extra strain is then placed on ligaments, which is dangerous for the spine and may cause long-term damage. Pain is a major red flag, especially lower back pain. Experts agree that a stronger core reduces pain pain.
- Improve Posture & Self Confidence – There are more people with poor posture than ones with good posture. Weak muscles cause poor posture and poor posture restricts muscle engagement. In essence, slouching causes more slouching. Study from Ohio State University suggest that good posture may also improve self-confidence. Kick the hunching habit by developing your back muscles.
- Fix Balance & Instability Issues – Do you experience trouble balancing? A weak core may be to blame.
- Prevent Back Injuries – Common back injuries such as sprains, strains and slipped disks can arise from a weak back. Prevention is easy through ongoing strength training.
- Avoid Back Stiffness Due to Office Jobs – People who sit for long periods of time are especially at risk for back problems.
- Build Core Strength – A strong core not only prevents injuries but allows you to perform daily tasks more easily.
No Equipment? No Problem!
The Benefits of Using Your Own Bodyweight
There really is no need to use weights as far as exercising your back goes.Some of the benefits of bodyweight back training include:
- Less Chance of Injury – Less equipment means less chance of misusing a machine or using excessive weights. Bodyweight exercises decrease the chances of injuries dramatically.
- Easy To Learn – Basic Bodyweight Back exercises are usually easier to master and learn than using any equipment.
- Perfect For Travelling – There’s nothing to remember to take with you. Bodyweight exercises are perfect when you are away from home.
- Available Instantly – Waiting for your kids to finish their breakfast? If you have just five extra minutes, you can sneak in a quick bodyweight workout. In fact, even if you’ve got only 2 minutes you may easily sneak in one exercise.
- No need for Gym Membership.
Recommended Equipment To Add to Your Back Workouts (Optional)
If you’re feeling confident with bodyweight exercises, you might want to explore some additional variations that include equipment.This list takes you through some of the more common workout accessories. Most of them still allow you to complete your back workout at home. They are also very affordable and easy to get.
Mat – Some of these exercises require lying on the ground. A mat provides extra comfort and cushion. If you don’t have a mat, you can also fold a blanket and lay it on the floor for some cushioning.
Pull Up Bar – The pull up bar is a simple and inexpensive way to give you more options for working out at home. Installation is easy, and you can even make your own pull-up bar. Once set up, you can add pull ups and chin ups to your home workout routine.
Weights – From a simple one pound wrist cuff to dumbbells, weights are a great way to immediately intensify a bodyweight workout without altering the movements. If you don’t have weights you can make your own.
Resistance Bands – These lightweight elastic bands can safely increase resistance without increasing the risk of injury(Recommended read: Resistance Bands 101)
Machines – Whether you go to the gym or work out at home, there are many machines that target your back muscles. Some of the favorites are the lat pulldown, rowing machine and back extensions.
Back Muscles Anatomy

Trapezius – Also known as the traps, this multi-action group of muscles originates on the neck and upper back. It reaches all the way to the outer edge of the shoulder blade. You can feel the traps working when you move the shoulder blades by lifting, pressing down or drawing them together.
Latissimus Dorsi – Often called the lats, this broad muscle extends from the mid-back to the armpit. The lats are engaged when pulling the arms towards the body such as in pull-ups or rowing.
Spinal Erectors – This vertical bundle of muscles runs the length of the spine. They work to extend, bend and rotate the spine. They are involved in a wide range of actions such as extending the spine, returning to standing from a flexed position.
Rhomboids – The rhomboids are snuggled in between the shoulder blades and the mid-back. These deep muscles work to draw the shoulder blades towards each other.
Rotator Cuffs – This group of 4 muscles originates on the shoulder blade and attaches to the upper arm. Any movement of the shoulder will rely on the rotator cuffs for support and mobility.
By now you should be convinced that you must work out your back. Now let’s go over the exercises.
The Top 5 Bodyweight Back Exercises Everyone Should Do (Videos & How To’s)
Before Exercise – Before doing any exercise, I recommend that you do a quick warm up. Nothing fancy, just do some jumping jacks or jog in place for five minutes. A good warm up increases blood flow, warms up the muscles, and helps prevent injury.
After Exercise – Doing some stretches after the exercises will minimize muscle soreness. In addition, stretching increases flexibility and range of motion.
About Safety – During exercise be aware of your sensations, you don’t need to use much force or push your limits. If you feel any severe or sharp pain, ease off and talk to a professional.
1. Hip Hinge
The hip hinge is a basic back exercise in which you crease at the hips, flexing the torso forward.Once you master this simple movement, you can build more advanced variations. The endless possibilities that can emerge from this foundational exercise mean that it will surely stay in your routine as you progress.
DIFFICULTY: Easy
MUSCLES USED: Spinal erectors along with Glutes and Hamstrings.
HOW TO DO HIP HINGES:
STEP 1. Stand erect with each foot placed directly underneath each hip, toes facing forward. If you have a mirror available, look at your alignment from the side. The ears, shoulders, hips, and ankles should be vertically aligned.
STEP 2. Place your hand on your hips. Engage the abdominal muscles by drawing the bellybutton back towards the spine. Keep the shoulders down by activating the back.
STEP 3. Creasing in the hips, bend forward, maintaining a straight spine and strong core. Keep bending until your torso is parallel to the ground. Feel length in your spine from skull to coccyx as you hold this position. If your hamstrings feel tight, go ahead and slightly bend the knees.
STEP 4. As you straighten the back and return upright, straighten the knees. This exercise is about control and alignment, so don’t rush the movement.
SETS & REPS: Begin with one set of 10 reps. As you progress, increase to 3 sets of 10 reps with 30 seconds of rest between sets.
TIPS: Be mindful of your alignment. People tend to round the lower back. Keep the back straight as you hinge to really work the intended muscles and to prevent injury in the lumbar area.
HIP HINGE VARIATIONS: For beginners, try the exercise sitting down in a chair with your feet firmly on the ground. Do the same hinging action, but only tilt your torso to 45 degrees.
For those who are more advanced, practice the standing hinge and challenge yourself by extending the arms overhead for the duration of the exercise. Always keep drawing the shoulders down.
Eventually, you may wish to add a bar across the back of your shoulders to increase the weight load.
2. Reverse Snow Angels
Remember making snow angels as a child? Flip your body over, make the same arm movements and suddenly you’re doing a great back exercise!
DIFFICULTY: Intermediate
MUSCLES USED: Trapezius with help from Deltoids, and Rhomboids.
HOW TO DO REVERSE SNOW ANGELS:
STEP 1. Lie on your belly. Use a mat if you’d like. Place your arms at your side with the palms of your hand to the ground. Keep the weight in your hips and legs evenly distributed.
STEP 2. Hovering your palms above the ground, reach your arms overhead until the thumbs touch. Keep arms straight the whole time.
STEP 3. Without letting arms touch the ground, slide them back down until they reach their starting position.
SETS & REPS: Aim for 3 sets of 10 reps. Rest for 30 seconds between sets.
TIPS: Keep the arms straight and hovering above the floor at all times. The front of your chin should be resting on the ground. If the bottom of your chin is in contact with the floor, you will strain your neck.
VARIATIONS: Beginners don’t need to reach the arms all the way over the head. Your arms can go however far is possible, working your way eventually to the overhead position.Experienced people can reach the arms up and over, arcing the pathway of the arm. To make even more challenging, add a wrist cuff to provide weight.
3. Locust
The locust exercise comes from a yoga pose. It’s an intense whole back body workout, meaning you’ll also fire up the muscles in the back of the legs and arms.
DIFFICULTY: Challenging
MUSCLES USED: All muscles on the back of the body will be activated. The biggest workers are the muscles of the lower back. You’ll also be working out the Lats, Traps, Rhomboids, and deep back muscles. Bonus muscles activated: Glutes, Hamstrings, and Calves.
HOW TO DO THE LOCUST EXERCISE
STEP 1. Lie down on your belly with your legs straight and your arms at your side. Place the palms face up. The forehead will rest on the floor, or a mat if you choose.
STEP 2. Inhale in this position. As you exhale, lift your chest, head, arms, and legs off the ground. Look up at the ceiling. Raise the legs as high as possible. Balance on your lower abdominal area.
STEP 3. Inhale in this position. As you exhale, release all of your limbs to the ground, back to the starting position.
SETS & REPS: Try 3 sets of 5 reps. Give your self 30 seconds of rest between sets.
TIPS: Don’t reach upwards with your arms. Keep the shoulder blades drawing inward toward each other as your fingers reach back towards your feet. The arms should remain parallel to the ground.
VARIATIONS: If the full locust pose is too challenging, you may choose to only lift the head, chest, and arms off the ground, leaving the legs attached to the floor. You’ll still get a major back workout with this modification.If you would like to intensify the locust pose, add wrist and ankle weights and/or hold the active pose for longer.
4. Bird Dog
Want better balance? The bird dog exercise develops core stability. You’ll be moving your arms and legs, but all the work happens in the core, as it powers up to maintain stability.
DIFFICULTY: Intermediate
MUSCLES USED: Abdominals and spinal erectors with assistance from Lats, Traps, Glutes, Deltoids, and Hamstrings.
HOW TO DO THE BIRD DOG EXERCISE:
STEP 1. Begin in a tabletop position with your hands and knees on the ground. Place your hands directly under the shoulders and your knees directly under your hips. If it’s more comfortable, work on a mat. Engage your core muscles so your belly doesn’t droop, and your back doesn’t collapse.
STEP 2. Reach your right arm out in front of you as you reach the left leg back and up. It’s important to stay lifted in the belly and long in the spine.
STEP 3. Return your limbs to tabletop position.
STEP 4. Repeat on the opposite side.
SETS & REPS: Start with 1 set of 10 reps (5 per side.) Aim to reach 3 sets of 10 reps with 30 seconds of rest in between.
TIPS: Keep your spine as long as possible! Reach back with the tailbone and reach forward with the top of the head. To keep your neck in a comfortable position, look at a point on the floor about 1 foot in front of your hands.
VARIATIONS: Beginners can try extending the back leg while keeping it attached to the ground. As stability increases, lift the leg higher and higher.To intensify this exercise, add ankle and wrist weights.
5. Thoracic Rotation
While the previous exercises have been focused on either strength or stability, the thoracic rotation exercise emphasizes mobility.
We use rotation in our backs every day such as when we transfer a bag of groceries from the cart to the car.
Neglecting mobility exercises in your workout routine can lead to range of motion limitations. The Thoracic Rotation is one of the best bodyweight exercises you could do and should do.
DIFFICULTY: Easy/Intermediate
MUSCLES USED: Traps, Rhomboids, Lats and Deltoids with assistance from Abdominals.
HOW TO DO THORACIC ROTATIONS:
STEP 1. Begin on all fours, in the tabletop position. Place your hands directly underneath your shoulders and your knees under your hips. Keep the spine long and your belly lifted.
STEP 2. Place the left hand on the back of your head.
STEP 3. Rotate your back so that your left elbow points up towards the sky.
STEP 4. Rotate your back in the opposite direction so that your left elbow points down to your right wrist.
SETS & REPS: 1 set of 10 reps per each side. Pause for 30 seconds between sides.
TIPS: Perform the rotation slowly and with control to avoid injury. This exercise emphasizes mobility, so reach as far as possible. Keep the shoulders pulling down the back and the core activated at all times.
VARIATIONS: If stability is an issue, feel free to lower down so that your knees are folded and your weight rests on your heels. In this modified position, your elbows will support your weight, instead of your hands.
If you feel confident with the thoracic rotation exercise, you can increase the range of motion by extending the moving arm. The hand will reach toward the sky in the upward position. When rotating downward, thread the hand under the supporting arm and reach it away.
Conclusion – Stronger Back in (almost) No Time
Even if you do these bodyweight back exercises just twice a week your back will get stronger before you know it.
What’s great about these back exercises is that since don’t use any weights they shouldn’t cause back discomfort.
I suggest you start with twice a week and whenever you are comfortable and if time permits you can increase the frequency of workouts to three times a week.
Another great bodyweight exercise I recommend is the Burpee, referred to by many experts as the single best bodyweight exercise there is.
Remember to consult with your doctor before beginning any training regimen.


Leave a Reply