Everybody’s into bodyweight training nowadays, and if you want to do an efficient body weight workout at home, you want to have a power tower or a dip station, which are staples for a home gym setup.
I show how you can make a DIY dip station and a homemade power tower using galvanized pipes or wood. Making a wall-mounted dip station or a pull-up tower is easier than you think. It’ll save you money, plus it’s fun, so why not?
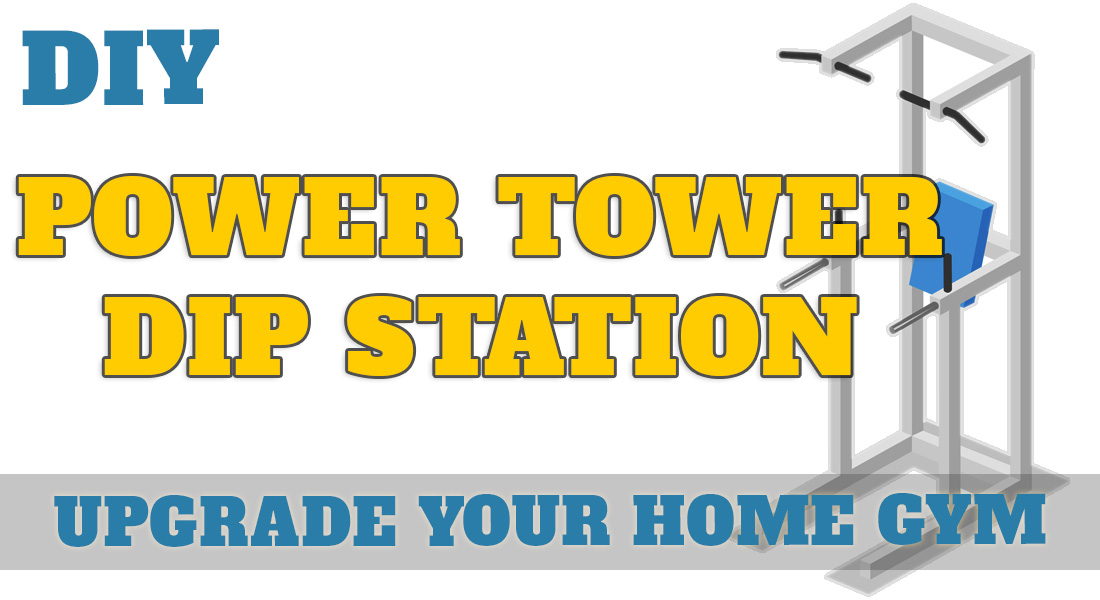
The power tower and the dip station are basic standalone structures with arm attachments for bodyweight exercises that target your upper body and core.
I show step-by-step DIY plans and videos on making them out of pipes or wood in either indoor or outdoor versions.
DIY Power Tower or Dip Station
First, let’s explain the differences between the power tower and the dip station, though they are mostly referred to interchangeably.
Dip Station
A dip station has two parallel handles just high enough to lift your feet off the ground. It’s used mainly to target your triceps and lower pecs with bodyweight dips.
Power Tower
A power tower is basically a dip station with a pull-up bar attached. Some power towers also come with other attachments like parallettes for incline pushups or a vertical bench for back support.
Should you build a dip station or a power tower?
The power tower is more versatile and will allow you to do more exercises. However, choosing whether to make a homemade dip station or a power tower also depends on your available space and DIY skills.
Why Bother Making a Homemade Power Tower?
If you wonder whether it is really worth the hassle to build your own power tower and whether one is necessary for home workouts, let me tell you why I definitely think so.
While the benefits of bodyweight training are well known, using a power tower gives you many options for bodyweight exercises, which you couldn’t otherwise do at home.
Besides your triceps and lower pecs, a power tower also specializes in hitting your lats, biceps, shoulders, and core.
Most of these machines’ exercises are compound movements that work out various muscle groups together. Compound movements burn more calories, improve your coordination, and get your heart beating faster than isolation exercises.
These movements are ideal for beginners. Isolation exercises are great for tweaking problematic muscle groups, but compound bodyweight movements will increase your overall strength and ability much quicker.
Because they engage more muscle groups, these gym machines will also tire you out faster. If you want an efficient, practical workout, it’s hard to beat a 30-minute routine on a power tower.
You can actually make a homemade dip station and turn it into a power tower by adding a homemade pull-up bar. You can even add other DIY exercise equipment, like a simple pair of parallettes or a DIY cable machine.
If you want to develop a thick back all while getting an intense cardio workout, killing two birds with one stone, I highly suggest you consider making a homemade rower on your DIY gym equipment to-do list.
DIY Plans for Power Tower & Dip Station
I will show you four methods for building a dip station or a power tower with a pull-up bar. While you only need to choose one method,
I suggest you first watch all videos and read my comments. It will be easier for you to decide then which one you like and that suits your skills.
DIY Galvanized-Pipe Power Tower (Easy)
TOOLS
- Pipe wrench or pliers
SUPPLIES
We’ll use a ¾-inch galvanized steel pipe to make this power tower. The diameter of the pipe you use depends on your body weight. If you’re on the heavier side, you may want to use a 1-inch or even 1½-inch pipe.
Every pipe length and accessory should come with screw threads on both ends, including the elbows, T-joints, nipples, and union.
Here are the pieces you’ll need:
- Four 36-inch pieces
- Three 24-inch pieces
- Four 12-inch pieces
- Two 8-inch pieces
- Two 90-degree pipe elbows
- Ten T-joints
- Two Pipe nipples (for connecting two T-joints)
- One Pipe union (for connecting two male pipes)
STEPS
- Let’s start from the top down. We’ll use a 24-inch length of pipe for the pull-up bar. Attach one 36-inch pipe to each end of one 24-inch pipe using elbow joints. Make two downward-facing right angles. It should look like a large lowercase letter n.
- Attach the bottom of each 36-inch pipe to another 36-inch pipe using the sides of two T-joints. The bottom of the T should face forward so you can attach your dip handles. Now your lowercase n is on stilts.
- Screw in an 8-inch pipe to each of those forward-facing T-joint bottoms. Those are your dip handles. They should jut out of the front of your lowercase n at right angles.
- Attach two 12-inch pipes together using the pipe union. This piece will go at the bottom of the power tower, parallel to the 24-inch pull-up bar. We’ll call it the low crossbar.
- Now, we’re going to attach the low crossbar to the bottom of your lowercase n using T-joints. Screw the bottom of a T-joint into each end of the low crossbar, and then screw the 36-inch pipes into the side of each T-joint that faces upward. The remaining sides of each T-joint should point downward. Now you’ve made your lowercase n into a large rectangle.
- Use the pipe nipples to attach each of those downward-pointing T-joint openings to the bottom of another T-joint, one on either side. The new T-joints should be upside down with the bottom of the T pointing up toward the pull-up bar. The sides of the new T-joints should point forward and backward, oriented parallel to the dip handles. That’s where you’ll attach your power tower’s feet.
- Attach the remaining 12-inch pipes to the backward-facing sides of those T-joints on one each side of your large rectangle. They should point in the opposite direction of the dip handles.
- Attach the remaining 24-inch pipes to the forward-facing sides of the T-joints, one on each side. They should point in the same direction as the dip handles. Now your rectangle has feet.
- Screw the bottoms of the four remaining T-joints to the four open ends of the feet you just attached. One should go on each open end of the 12-inch pipes that point backward and one on each 24-inch pipe that points forward. The top of each T should run parallel to the low crossbar and the pull-up bar. These are your power tower’s toes and should help give you extra stability.
- Stand your power tower on the end. The 36-inch pipes are the sides of the power tower and should point upward. The feet and toes should rest firmly on the floor.
- Do a few pull-ups and dips to test out your DIY Galvanized-Pipe Power Tower!
TIPS
- If you want a bit more stability, put some ballast on the feet. You can use sandbags, weight plates, suitcases, or anything low and heavy you find around your house.
- The DIY Galvanized-Pipe Power Tower pairs well with a set of easy to make galvanized steel parallettes. Both are made from the same pipe type and diameter, so your home gym will look sharp and uniform.
DIY Wooden Outdoor Power Tower
I added dip handles to this video example of a DIY pull-up bar to turn it into a full-blown power tower. I also added heavy-duty L brackets to make the frame more stable.
TOOLS
- Power drill and drill bit set
- Permanent marker
- Measuring tape
SUPPLIES
- Two 4-by-4-inch wooden planks, 7 feet long
- Two 4-by-4-inch wooden planks, 4 feet long
- Two 2-by-4-inch wooden planks, 31.5 inches long (the same size as the steel pipe with floor flanges attached for the base)
- Four 2-by-4-inch wooden planks, 30 inches long with both ends cut at 45-degree angles perpendicular to each other (for supports)
- One 1-inch steel pipe with threaded ends, 30 inches long (for pull-up bar)
- Two 1-inch steel pipes with threaded ends, 10 inches long (for dip handles)
- Four 1-inch iron threaded floor flanges (make sure they fit the steel pipes)
- Sixteen ¼-inch concrete screws, 3¼-inches long (to attach pull-up bar and dip handles)
- Plenty of exterior screws, 3½-inches long (50 should be enough)
- Four 12 Heavy-duty L brackets (example)
STEPS
The Pull-up Bar
- Let’s start with the pull-up bar attachment. Stand one of your 7-foot four-by-fours on end and measure and mark the ideal height for your pull-up bar.
- Place the two four-by-fours side by side on the ground so you can mark the exact same height on both planks.
- Use the concrete screws to attach a floor flange to each four-by-four at the height you marked.
- Use two heavy-duty L brackets and eight exterior screws to attach one of the 7-foot planks to one of the 4-foot planks in a T shape. The 4-foot plank is the top of the T, and the 7-foot plank is the stem. Make sure the floor flange is not on the same side as the tips of the 4-foot plank.
- Repeat with the other 7- and 4-foot planks. Now you should have two giant T’s with floor flanges attached. The top of the T is the base of your power tower.
- Let’s attach the pull-up bar. Stand up your two T’s side by side at the appropriate distance. The bases should be on the ground, and the floor flanges should face each other. You can get a friend to help you or just lean one T against a wall.
- Screw the 30-inch long steel pipe into the floor flanges, first on one side and then the other. Now the two T’s are connected, and the structure should be able to stand on its own.
The Base
- Let’s reinforce the base. Screw a 31.5-inch long two-by-four between the ends of the two 4-foot planks on one side of your structure. Your base will be a little stronger if you anchor them a few inches inside the ends of the 4-foot planks instead of at the very tips. You can use L brackets for extra strength if you like.
- Repeat with the second 31.5-inch two-by-four and the opposite ends of the 4-foot planks. Now the base of your power tower should look more or less like a rectangle.
- We’re going to use the 30-inch two-by-fours with 45-degree-angle ends for extra reinforcement. We’ll start by making one of your upside-down T’s look more like an upside-down Y. Wedge 45-degree planks into the right angles on both sides of one of your upside-down T’s. Anchor them firmly in place with exterior screws.
- Repeat with the other upside-down T and the two remaining 45-degree planks. Now you should have two upside-down Y’s connected via pull-up bar at the top and anchored securely to a rectangular base at the bottom.
The Dip Station
- Let’s attach the dip handles. Use the measuring tape and marker to find and mark the ideal height on the front of one of the 7-foot two-by-fours. The right height depends on how tall you are. For most people, it will be somewhere between 4 and 5 feet off the ground. Make sure your feet will be able to hang slightly above the floor when you’re up on the handles with your elbows straight.
- Mark the exact same height on the front of the other 7-foot plank as well.
- Attach floor flanges to the front of each 7-foot plank at the height you marked. Using the concrete screws will give you extra durability.
- Screw in one 10-inch steel pipe to each floor flange. Now your power tower has dip handles!
- Reward yourself for a job well done with a grueling workout on your Wooden Outdoor Power Tower!
TIPS
- To keep the wood from splitting, you can use your drill to make a small pilot hole before inserting each screw.
- If you’ll be cutting your own planks from larger pieces, it’s safer to measure and cut the first plank from each pair and then use the first one to measure the second one. That way, all your plank lengths and angles will match up.
DIY Wall-Mounted Pipe Dip Station
TOOLS
- Power drill and drill bit set
- Permanent marker
- Measuring tape
SUPPLIES
- Two ¾-inch pipes, 72 inches long
- Two ¾-inch pipes, 36 inches long
- Two 90-degree pipe elbows
- Four ¾-inch iron threaded floor flanges (make sure they fit the steel pipes)
- One 1-by-4-inch wooden plank, 30 inches long
- Two 2-by-4-inch wooden planks, 12 inches long (if you need to double your studs)
- Lots of screws (make sure they fit the floor flanges)
STEPS
- The most important part of this project is finding the right place to mount it. Try to find two exposed beams or wall studs at least 4 inches wide, each with about 24 inches between them. They need to be at least 4 inches across to fit each floor flange, and the ideal width for a dip station is around 18 to 24 inches, depending on your height. I recommend looking for exposed wall beams in your garage, attic, basement, deck, porch, barn or shed.
- If your beams or studs are too narrow to fit the floor flanges, you’ll have to double them. You can screw a 12-inch two-by-four to the side of each narrow stud to make it thicker if necessary.
- Once you’ve found an ideal location, it’s best to start by assembling your dip station before attaching it to the wall. The 30-inch one-by-four plank will be your base. You need to mount two floor flanges on it at the same width as your exposed wall beams. Hold the one-by-four up against the wall beams and mark the right width with your permanent marker.
- Put the one-by-four flat on the floor with the floor flanges on top at the correct width. Mark and drill the pilot holes where the screws will go, and then screw the floor flanges to the base.
- Attach one of the 72-inch pipes to your base by screwing in one of its threaded ends to one of the floor flanges. Repeat with the other 72-inch pipe and floor flange.
- Attach a pipe elbow to the top of each 72-inch pipe. Make sure the open end of each elbow is pointing in the same direction perpendicular to the base.
- Attach a 36-inch pipe to each pipe elbow. Now your base is attached to two upside-downs Ls.
- Screw a floor flange to the open end of each 36-inch pipe. You’ll use those to mount your dip station to your wall.
- Place your dip station against your wall in its final position. Each open floor flange should sit against one of your exposed beams, and your base should be flat on the floor, separated from the wall by your upside-down L pipes.
- Mark the exposed beams inside the holes in the floor flanges, and then move the dip station away from the wall so you can drill your pilot holes.
- Put the dip station back in its final position, and screw the floor flanges to the wall using your pilot holes.
- Attached to a sturdy wall, this dip station should be able to support weighted dips. Test it out with your body weight first, and then try a few dips with extra weight.
TIPS
If you mount this below or beside the Wall-Mounted Pull-up Bar from our DIY Pull-up Bar article, you can enjoy a complete power tower.
DIY Wooden Indoor Dip Station
This video example uses 60-by-60-millimeter wooden planks, which we’ve rounded up to four-by-four-inch planks for extra strength and convenience. I also added heavy-duty L brackets and floor flanges to make the contraption more stable.
I used the dimensions of an average person for this dip station, but you’re welcome to customize the height and width to your ideal size.
TOOLS
- Power drill and drill bit set
- Permanent marker
- Measuring tape
SUPPLIES
- Two ¾-inch steel pipes with threaded ends, 36 inches long (for dip handles)
- Four ¾-inch iron threaded floor flanges (make sure they fit the steel pipes)
- Two 4-by-4-inch wooden planks, 24 inches long (for crossbars)
- Two 4-by-4-inch wooden planks, 48 inches long (for base)
- Four 4-by-4-inch wooden planks, 32 inches long (for pillar
- Forty-Eight ¼-inch screws, 3¼-inches long
- Eight Heavy-duty L brackets (like these)
STEPS
- We’ll start by attaching the dip handles to the pillars. Lay one of the 32-inch planks sideways on the floor, and place a floor flange on it at the very end of one side. Mark the plank inside each of the floor flange’s screw holes.
- Repeat with the other three 32-inch pillars and floor flanges.
- Attach a floor flange to each pillar in your marked location. Make sure to drill pilot holes first using a drill bit slightly smaller than your screws.
- Screw one of the steel pipes into one of the attached floor flanges. Screw the other end of that pipe into another floor flange and pillar.
- Repeat with the other steel pipe and the remaining two-floor flanges attached to the pillars. Now you should have two wide lowercase n’s.
- Let’s attach the bases. Turn one of your lowercase n’s into a full rectangle by attaching a 48-inch four-by-four to the bottom of both 32-inch pillars. The tips of the 32-inch planks should go on the sides of the 48-inch plank, not the other way around. Use heavy-duty L brackets on both inside angles.
- Repeat with the other lowercase n and the remaining 48-inch plank. Now you should have two full rectangles. Don’t worry if there’s a little bit of overhang.
- It’s time to attach the two rectangles using our crossbars. Stand your two rectangles side by side with just enough space between them to fit the 24-inch crossbars. The dip handles should be at the top running parallel to each other, and the bases should lie flat on the floor.
- If we attach the crossbars to the bottom of the dip station, in the same plane as the bases, the screws will run into each other. It’s best to attach them about 12 inches above the bottom of the base. Wedge one of your 24-inch crossbars between your two rectangles about a foot above the ground. Place L brackets in the two inside top angles, and mark and drill all pilot holes.
- Use the L brackets to attach your crossbar to your dip station in the marked locations. There should be an L bracket at either end of the crossbar connecting the top side of the crossbar to the inside of each pillar. It may be helpful to lay your crossbar flat on the ground to screw in the L brackets before connecting it to the pillars.
- Repeat with the other side of the dip station and the remaining crossbar and L brackets.
- Now you’ve turned your two flat rectangles into a 3D rectangle, which is technically called a cuboid. That cuboid with handles is your dip station.
TIPS
- The hardest part of this project is cutting the wood to the right lengths. It’s actually pretty easy to put together if you go to a lumber vendor who can cut the wood for you to your specified dimensions.
- You can turn this dip station into a full gym by pairing it with the Super Simple Homemade Pulley machine, parallettes, and pull-up/chin-up bar.
Conclusion
As you can see, you don’t have to be a handyman to make your own dip station or power tower. The one you want to make will depends on your goal and where you want to place it, indoors or outdoors.
If you want something easy and quick, you can choose the galvanized-pipe power tower. However, if you aren’t afraid of some woodworking, you can make an excellent wall-mounted dip station. If you are lucky enough to have a backyard, and with just a little more work, you can make a sturdy outdoor power tower that can serve you for a long time.


Leave a Reply