Using a rowing machine is one of the best ways to do cardio. It has unique advantages over other cardio equipment. Until now, if you wanted to use a rower at home, you would have to spend quite a bit of money.
Making your own rowing machine is easier than you think. We are going to show your three ways to make a DIY rowing machine.
We’ve included an easy version that practically anyone can slap together. We bet you didn’t know that you can make an excellent homemade rowing machine in less than one hour using a skateboard and some resistance bands.
If you aren’t afraid of some woodworking, we will also show you how to make a more advanced indoor rower using some wood and a pulley. You can think of it as a kind of homemade Concept 2 rower.
The Advantages of Making (and using) a Homemade Rower
Rowing really does have many things to offer that you can’t find in the more common cardio equipment like treadmills or ellipticals. We discussed the differences between rowers and other equipment here.
We think that after you read this section, you’ll realize why it’s is such a good exercise machine.
You can buy excellent rowing machines for home, and budget options are available too, however, expect to pay even up to a thousand or more for elite models.
Luckily it’s also quite easy to build your own rowing machine, something that can’t be said about a treadmill or an elliptical! And not only that, it has a bunch of unique advantages.
IT IMPROVES YOUR STRENGTH & WORKS MORE MUSCLES
If you do it right, rowing is a full-body workout. About 60% of the motion is done with your legs, 30% with your torso, and 10% with your upper body. Each rep uses nearly 90% of the muscles in your body.
Even better, rowing uses all these muscle groups together as a unit. This can help make your regular, daily movements easier and more coordinated. Rowing also keeps your stabilizing muscles sharp, which improves your balance.
Ellipticals and treadmills at great machines for weight loss, but they do very little for building strength. The rowing motion really does give your upper body some serious work.
CAN HELP YOU BURN MORE CALORIES IN THE LONG RUN
If you’re looking to cut down on body fat, rowing is one of the most efficient ways to burn calories.
A good, vigorous stroke can burn around 500 calories per hour, providing you can keep it up that long. Even just 15 minutes on your homemade rowing machine is a loaded cardio workout that can strengthen your heart and lungs and improve blood flow.
Rowing has a better potential to burn calories not only in the short term (during the exercise), but in the long-term as well. It works more muscles in your body than other cardio machines, especially upper body muscle groups.
Rowing has more potential to increase your LBM (lean body muscle mass). Since a pound of muscle in your body burns more calories than a pound of fat (even at rest), you can eventually burn more calories.
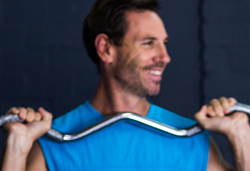
It’s no wonder that Hugh Jackman loves rowing so much, and even credits rowing for staying lean at 51.
LOW-IMPACT AND SAFE
In spite of how intense it is and how much energy it burns, rowing is surprisingly safe. The rowing stroke is also gentle on your joints and has almost no impacts or jolts. Its intensity level, combined with its level of safety, gives you an incredible bang for your buck. It makes rowing one of the most efficient full-body workouts.
IMPROVES YOUR POSTURE
Rowing can also help you improve your posture. Many exercise enthusiasts like to focus on muscles they can see in the mirror. These tend to be on the front of your body, including your pecs, biceps, quads and front delts.
Such muscles, also known as the anterior chain, usually get more attention than they should. Focusing too much on these anterior muscles and less on your back muscles can cause you to hunch forward and lead to back curvature and hip strain.
The rowing stroke is unique because it focuses more on your posterior chain, the muscles on the back of your body. This can help balance your muscle strength, which will correct your posture and reduce your risk of injury later in life.
Another great benefit is how easy it is for beginners. It doesn’t take much practice to get the basics of the stroke down, and once it clicks in your mind, you won’t want to stop.
Like jumping in a river and letting it carry you away, rowing can be an almost hypnotic experience. The fluid motion can get your muscles in sync and free up your mind to wander creatively.
Although rowing started in the water, these days, you can buy a rowing machine for home or use a DIY rower to simulate the movements of a boat in the water from the safety and comfort of your home.
Although it looks like just one exercise, small adjustments can turn it into a high-intensity sprint or a low-intensity endurance gruel. You can use it to burn an incredible amount of calories, all while increasing your upper body strength.
DIY Rowing Machine – 3 Methods
We are sure that by now, after reading about the advantages of the rowing machine, you can’t wait to make your own rowing machine.
We will cover three methods, beginning with the skateboard method, which is the easiest, continuing to the shoelace method, and finally the power rower.
We suggest you see all three methods first before deciding on which DIY rower to make.
Homemade Rowing Machine with a Skateboard (Easy)
SUPPLIES
- 2 Dumbbells or dumbbell-sized blocks of wood or crates (for foot anchor)
- 2 Resistance bands
- 1 Wooden dowel or metal rod about a foot long (for handle)
- 1 Skateboard (for seat)
- Low upright structure (to anchor the bands)
STEPS
- Find a sturdy, low upright structure you can use as the base of your Skateboard Rower. One of the legs of a power rack or other workout machine will work. You can also use a porch beam, a table leg or even a hook anchored to a wall.
- Let’s start by making the foot anchor. Place the dumbbells, blocks of wood or crates against the low upright structure one at a time.
The first one should be placed lengthwise to give you a bit of distance from the base.
The second one should be placed sideways against the first so you can rest both your feet on it. It should look like a capital T with the bottom of the T facing the structure. - Tie one end of one resistance band to your upright structure just above the dumbbell T-formation. Tie the other end to your skateboard’s front axle. Your skateboard should now roll forward and backward in front of your upright base, blocked from touching the base by your dumbbell foot anchor.
- Now tie one end of the second resistance band to the upright structure. It should be at about your chest height when you sit on the skateboard.
Tie the other end of the band around the middle of the dowel or rod you’re using as a handle.
If you want more resistance, tie multiple resistance bands to the handle and structure. - Sit in the middle of the skateboard, and rest one foot on each side of the T-shaped foot anchor. Grab one end of the handle in each hand, and row!
TIPS
- To get in the groove of using the Skateboard Rower, try to repeat, “Legs, core, arms,” as you push out and, “Arms, core, legs,” as you pull back in.
- This means you start the stroke by extending your legs, then hinge your core slightly backward, then pull the handle to your chest with your arms. On the way back, extend your arms, hinge your core a bit forward, then let your legs bend, and the bands will pull the skateboard back to the starting position.
Shoelace DIY Rower (Medium)
TOOLS
- 1 Power drill and drill bit set
- 1 Permanent marker
SUPPLIES
- 1 Permanent marker
- 1 Set of resistance bands
- 1 Pipe, dowel or rod, about a foot long (for handle)
- 4 Rigid caster wheels (example)
- 16 Mounting bolts and nuts that fit the caster wheels
- 1 Sturdy piece of plywood, about 15 by 20 inches
- 1 Seat cushion
- 1 Non-slip office chair floor mat (for carpeted floors), or
- 1 Non-slip rubber floor mat (for other floors)
- 2 Shoelaces
STEPS
Resistance Base
- Anchor one end of your resistance band or bands to a sturdy, low upright structure. The number of bands you use depends on the amount of resistance you want.
Make sure there’s enough room in front of the structure to fit the length of your resistance band and your floor mat. You can use one of the legs of your bed, a porch beam, a low staircase banister or even a tree. If you have a door anchor, you can anchor your band to any door. - Tie the other end of your resistance band to the middle of the pipe, dowel or rod you’re using as a handle.
Rolling Seat
- Now, let’s make the rolling seat. Place each caster wheel plate-side down on each corner of the piece of plywood. Make sure the wheels are placed symmetrically, parallel to the long sides of the board and a couple of inches away from each outer edge.
- Use the permanent marker to mark around the borders of each plate. Also mark the 16 spots where you’ll need to drill holes for the mounting bolts.
- Use the power drill and appropriately-sized bit to drill the 16 holes
- Bolt the four caster wheels securely to the piece of plywood. Make sure the nuts go on the same side as the wheels.
- Place the seat cushion on top of your rolling seat. You can glue, staple or tie it down with some twine if you like.
Foot Anchor
- Now we’re going to make a foot anchor out of the floor mats and shoelaces. Use the right mat or combination of mats depending on your floor. The idea is to have a surface beneath your rolling seat that won’t slip around while you’re rowing. If necessary, you can even use both mats, one on top of the other.
- Drill two holes in the front of your mat or mats. The holes should be 2 inches from the front of the mat and about hip-width apart.
- Tie the ends of one shoelace together to make a shoelace loop. Repeat with the other shoelace.
- Thread each shoelace loop halfway through each floor mat hole. Those are the stirrups where you’ll put your feet.
Setting it all up
- Now, let’s put all the pieces together. Extend your resistance band and handle in a straight line out in front of the low structure as far as the bands can go without stretching.
- Place your mat with its shoelace stirrups about a foot in front of the handle. The shoelace side should be facing the handle.
- Center the rolling seat on top of the mat.
- Sit on the rolling seat. Slip each foot into the two loops of each shoelace stirrup. Pick up the handle, and start rowing!
TIPS
- This is an extremely portable DIY rowing machine. You can roll up the floor mats and resistance band, place them on the rolling seat and take the whole contraption away with you. All you need is a sturdy structure with plenty of room in front to anchor the bands, and you can row wherever you go.
Power Rack Rower (Pro DIY Rower)
TOOLS
- 1 Power drill and drill bit set
- 1 Permanent marker
- 1 Pair of scissors
SUPPLIES
- 1 Power rack with low pulley and long cable
- 1 Handle (you can use strap handles, a short bar, an EZ bar, a double-D handle or a triceps rope)
- 1 2-by-10-inch wooden plank, 6 feet long (for base)
- 1 2-by-4-inch wooden plank, 5 feet long (for rail)
- 3 2-by-4-inch wooden planks, 18 inches long (for crossbars)
- 2 2-by-4-inch wooden planks, 12 inches long with both ends cut at 45-degree angles perpendicular to each other (for foot anchor)
- 2 2-by-4-inch wooden planks, 9 inches long (for foot anchor)
- 1 Belt or strap (for foot anchor)
- Plenty of #9 screws, 2 ½-inches long (50 should be enough)
- Supply
- 4 Rigid caster wheels (example)
- 16 Mounting bolts and nuts that fit the caster wheels
- 2 Pieces of ¾-inch plywood, about 15 by 15 inches (for seat)
- 1 Seat cushion
STEPS
Base and Rail
- The two-by-ten is your base. Screw one 18-inch long two-by-four crossbar to each end of the two-by-ten. Each two-by-four should sit flat, centered on top of the two-by-ten and perpendicular to it. It will look like a giant capital letter I. These are your stops to make sure the rolling seat doesn’t roll off the base.
- Screw the 5-foot long two-by-four to the dead center of the two-by-ten. The two should be parallel. One end of the two-by-four should touch one of the 18-inch crossbars. There should be about a foot of room on the other end to build your foot anchor. This is the rail your rolling seat will ride on.
- Screw the third 18-inch long crossbar to the two-by-ten so it touches the unblocked end of your two-by-four rail. It should be centered over the two-by-ten and parallel to the other 18-inch crossbars.
Now your mutant capital I has a rail in the center, one horizontal crossbar on one end and two horizontal crossbars on the other end. Those two horizontal crossbars should have about a foot of space between them. We’ll call this third 18-inch piece the middle crossbar.
Foot Anchor
- Screw each 9-inch long two-by-four upright to each outer edge of the 18-inch crossbar that doesn’t touch the rail. Make sure you attach them to the front end of the long side of the crossbar, not the tips.
These will hold your foot anchors. Now your mutant capital I looks like it has two feet sticking up at the front of the base. We’ll call these the upright feet. - The 12-inch long two-by-fours with ends cut at 45-degree angles will be the foot rests for your foot anchor. They should fit nicely, each one wedged between the middle crossbar and one of the upright feet. Screw them securely at both ends.
You should now have two wooden right triangles at the front end of your mutant capital I. The upright feet should be at right angles to your base and the 45-degree foot rests are your hypotenuses. - We’ll use the belt as straps to anchor your feet to the foot rests. Sit down on the base with one foot on each slanted foot rest. Measure and cut the belt into two lengths that are each long enough to fit comfortably around one of your feet. Twelve or 13 inches each should be plenty.
- Screw one side of one of the lengths of belt into one side of one foot rest, and then repeat with the other side. Repeat with the other length of belt and the second foot rest. Now your foot rests have straps to hold your feet in place during the return part of the rowing stroke.
Rolling Seat
- You need to attach the caster wheels to your plywood seat in exactly the right places so it rolls smoothly along your rail. Don’t worry, it’s pretty easy. Center one of the pieces of ¾-inch plywood on top of the rail. Make sure the rail is in the dead center of the plywood with the sides exactly parallel.
- Use the permanent marker to mark the rail lines on the underside of the plywood.
- Turn the plywood over and place the four wheels plate-side down along the lines you just marked. Two wheels go along the outer edge of the left line, and two go along the outer edge of the right line. Each wheel should be a couple of inches away from the closest top or bottom edge. Make sure the wheels roll parallel to the lines.
- Mark around each border of each wheel plate and inside all 16 bolt holes.
- Remove the wheels, and stack the two pieces of ¾-inch plywood on top of each other. Two pieces of plywood will make your seat stronger. Make sure the marked side is facing up.
- Drill the 16 bolt holes through both pieces of plywood.
- Put the wheels back in their marked spots, and bolt the four caster wheels to the stacked pieces of plywood through the holes you drilled. Remember, the nuts go on the same side as the wheels.
- Test your rolling seat on your rail. Make sure the wheels fit snugly around the rail, roll smoothly along the base and stop firmly at the crossbars at each end.
- Place the seat cushion on top of your rolling seat. You can leave it as it is or make it fancy by covering it with leather or vinyl and stapling the edges to the bottom of the seat.
Setting it all up
- Make sure your power rack has enough room in front of it to fit your rower. You’ll need at least 7 feet of space.
- Place your rower lengthwise in front of one of your power rack’s low pulleys. Leave about a foot of space between the rower and the pulley. Line up the rower with the pulley like a rifle scope. When you pull the cable out of the pulley, it should pass between the foot rests and run directly over the rail.
- Attach your favorite handle to the low pulley’s cable.
- Place your rolling seat on the rail.
- Sit on the rolling seat, and put one foot on each slanted foot rest. Pick up the handle, and row!
TIPS
- The great thing about building a rower around a power rack is that you can use as much or as little weight as you want. We recommend starting with 10 or 20 pounds so you can get the hang of the movement.
- When screwing the various wooden planks together, you can drill pilot holes before driving the screws in to make sure the wood doesn’t split. Use a drill bit one size smaller than the screws.
- If you’ll be cutting your own 45-degree angles for the foot rests, you can use the first plank as a template for the second one. That way the angles will be guaranteed to match.
- If you don’t have a power rack or low pulley, you can use this contraption with resistance bands anchored to a low upright structure. See the Resistance Base section of the above Shoelace Rower for instructionsץ
Conclusion
If you’ve seen the included how-to videos, you should be pretty convinced that a DIY rowing machine is not that hard to make.
While you can’t easily make your own treadmill, you can definitely make your own rowing machine. Don’t forget to check out our other DIY exercise equipment guides.


Leave a Reply